
Here we have a rather sorry looking little watch from somewhere around the late 1930’s or early 1940’s. This came to me some time ago as part of a job lot of watch making stuff and has sat, unloved in my “to-do” bin patiently awaiting some attention. Well it’s time has come and it has at last made it onto the bench.
At just 30mm across the case it is quite a small watch, although not out of keeping with the fashions of the day. I have dated it roughly based on it’s style, and also on the movement caliber; a Cyma Ref:234. This movement was used in the British military issue watch supplied by Cyma to the British government during the second world war as one of what has become known as the “Dirty Dozen” watches, a highly collectible set of watches from twelve different suppliers, used by the British military. More details of these can be found here; https://wornandwound.com/military-watches-of-the-world-the-dirty-dozen/
This little chap though is not military, although it does look like it has been through the wars. The case and crystal are in poor shape, the stem is broken off and the crown is missing. Needless to say it is a non-runner.
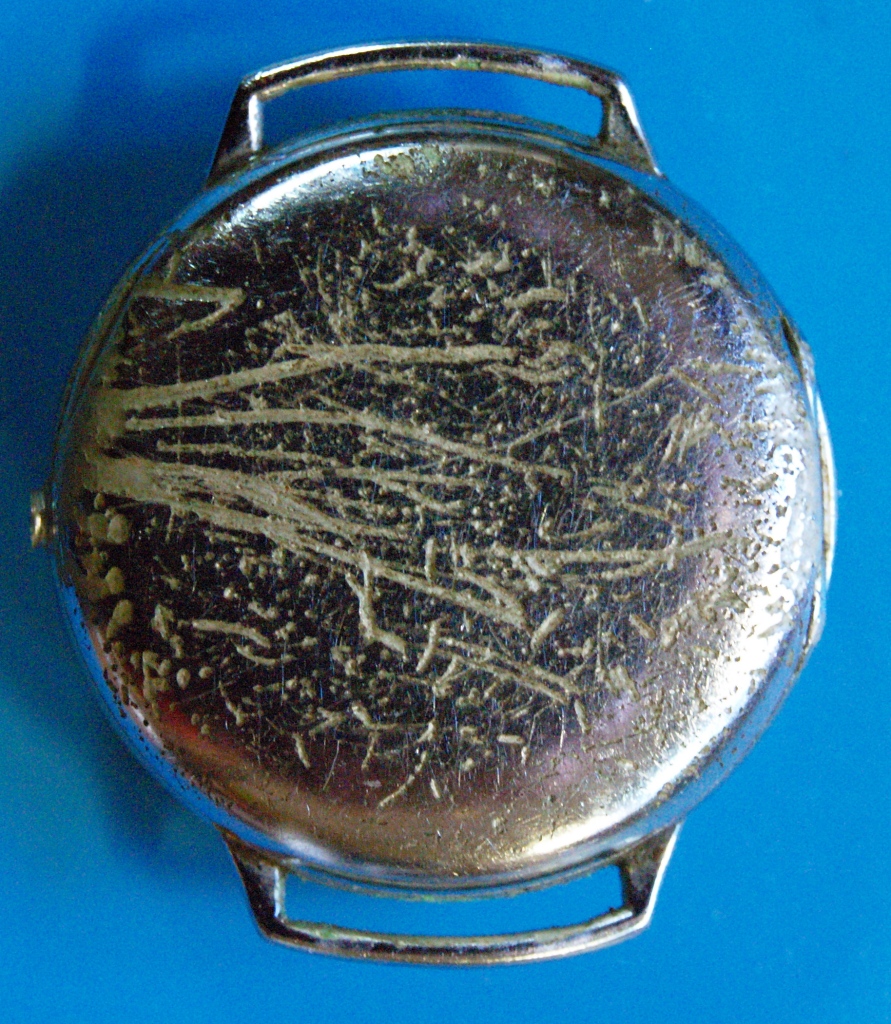
The chrome plated nickel case has a hinged back rather like a pocket watch, which carries the scars of previous less than careful attempts to open it which have resulted in the chrome being scratched through, exposing the nickel to corrosion.
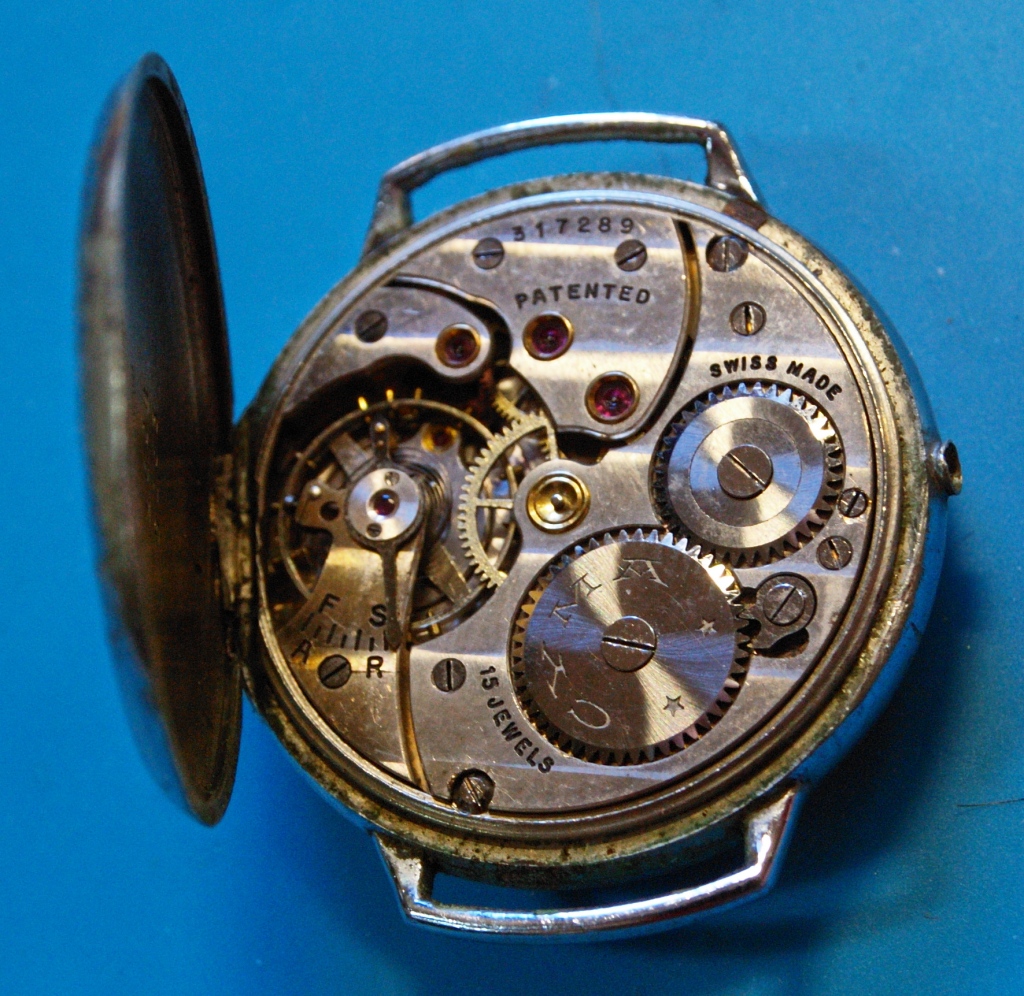
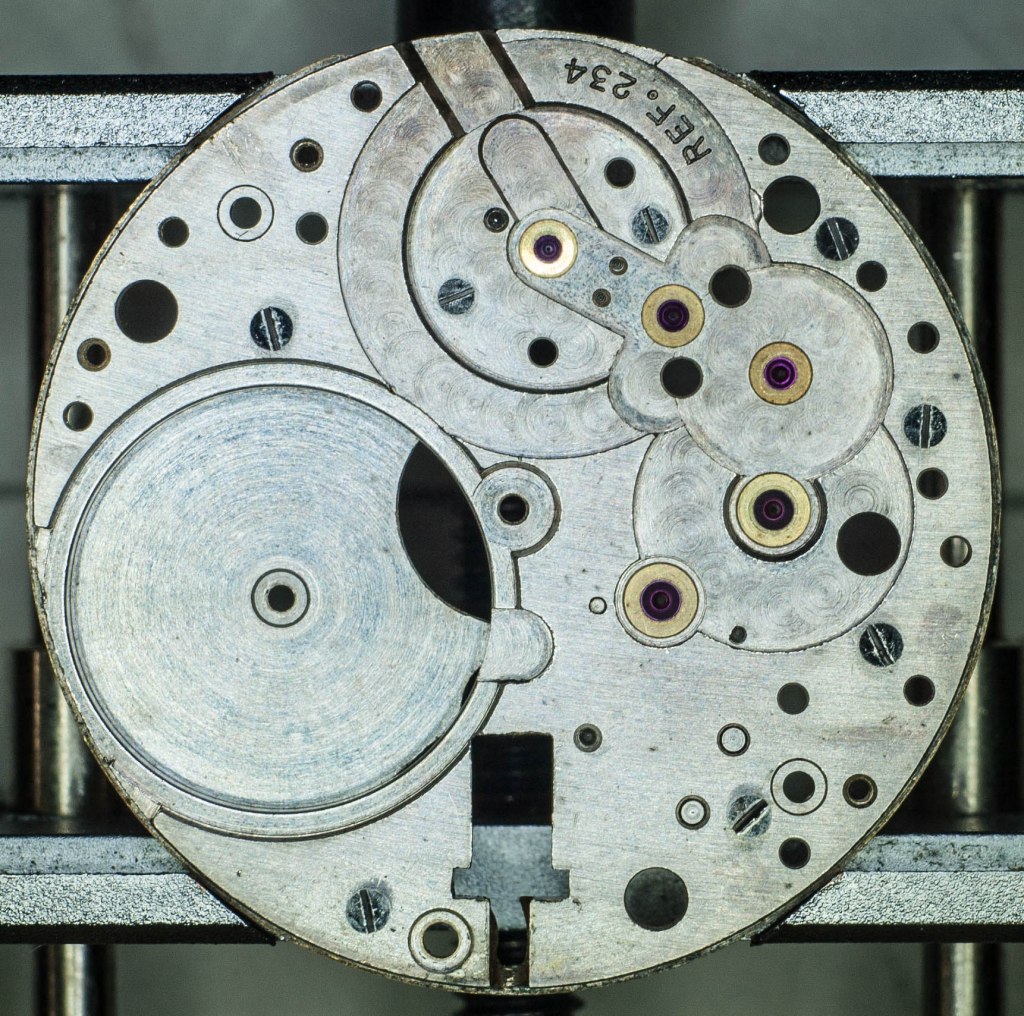
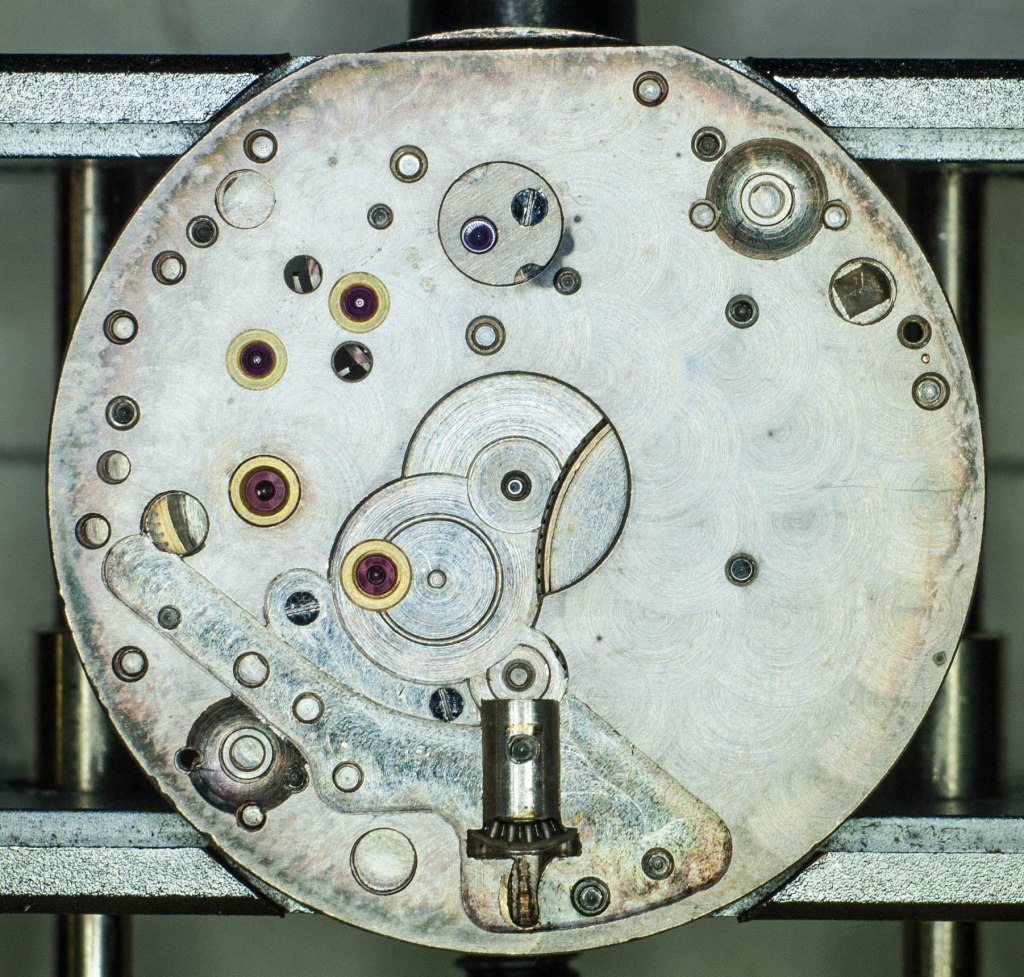
Once opened up we can see a rather grubby and neglected movement, and another issue comes to light; the balance wheel is flopping around all over the place indicating a likely broken balance staff pivot.
The movement comes out through the front so first the bezel has to come off, then the two retaining screws are removed, and then you would normally remove the crown and stem to allow the movement to just drop out. However, as the stem is broken off and couldn’t be removed, this one required just gentle pressure opposite the pendant tube to encourage the movement to hinge out.

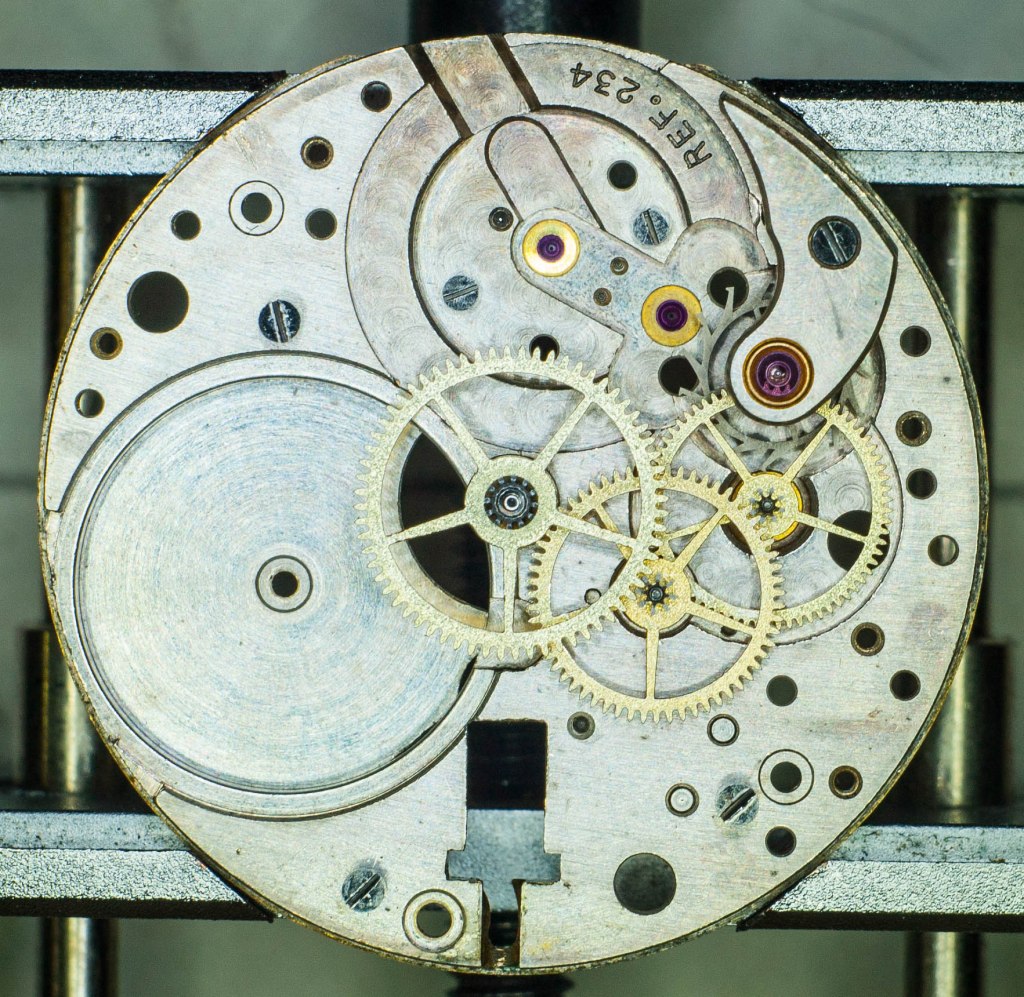
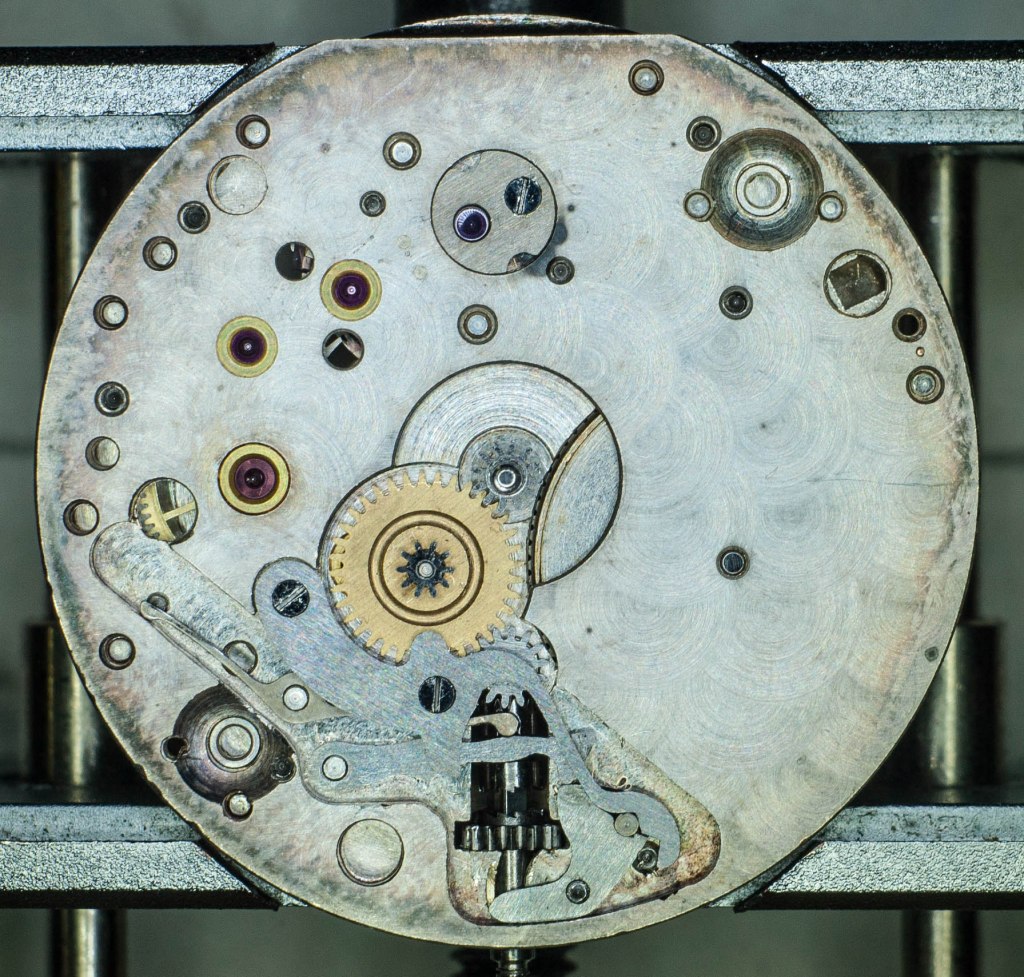
And here it is, complete with random fibers and in need of a clean but otherwise in reasonable condition. You can see the broken off stub of the stem poking out behind the 3 marker.
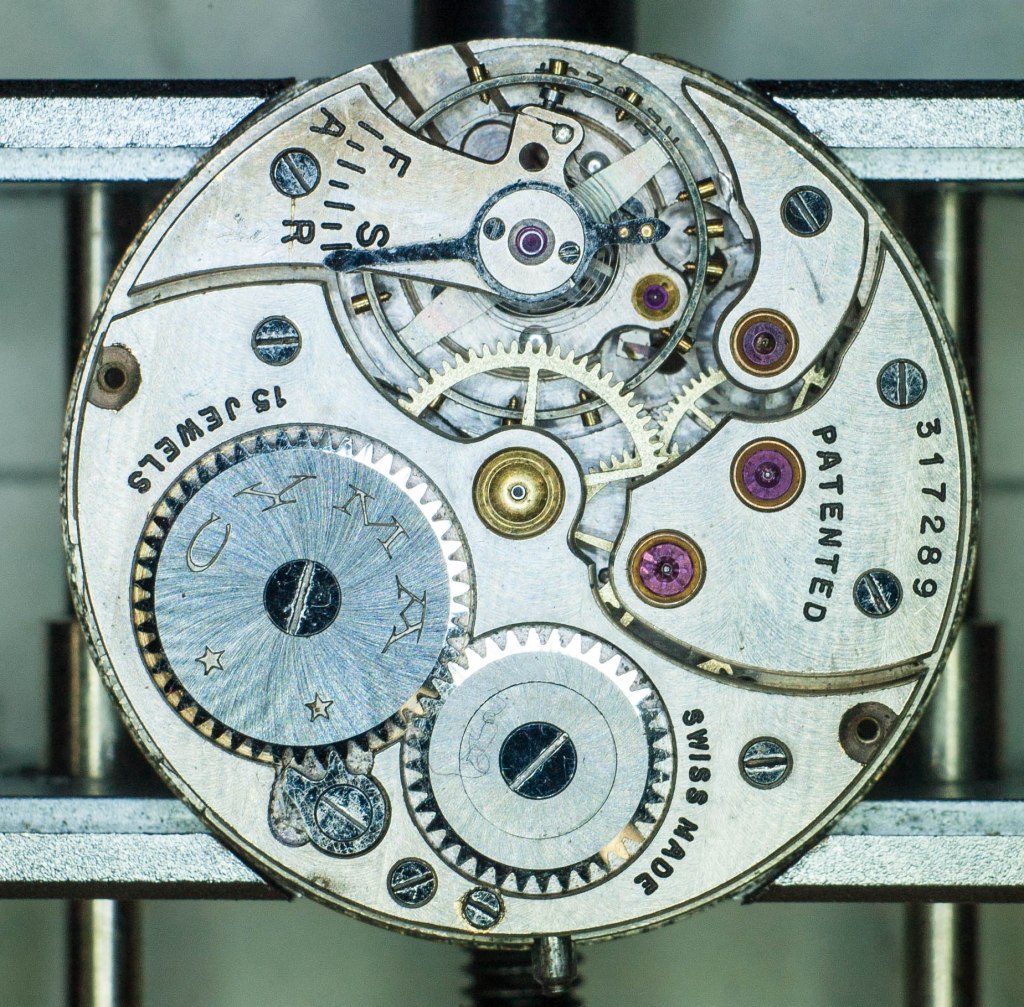
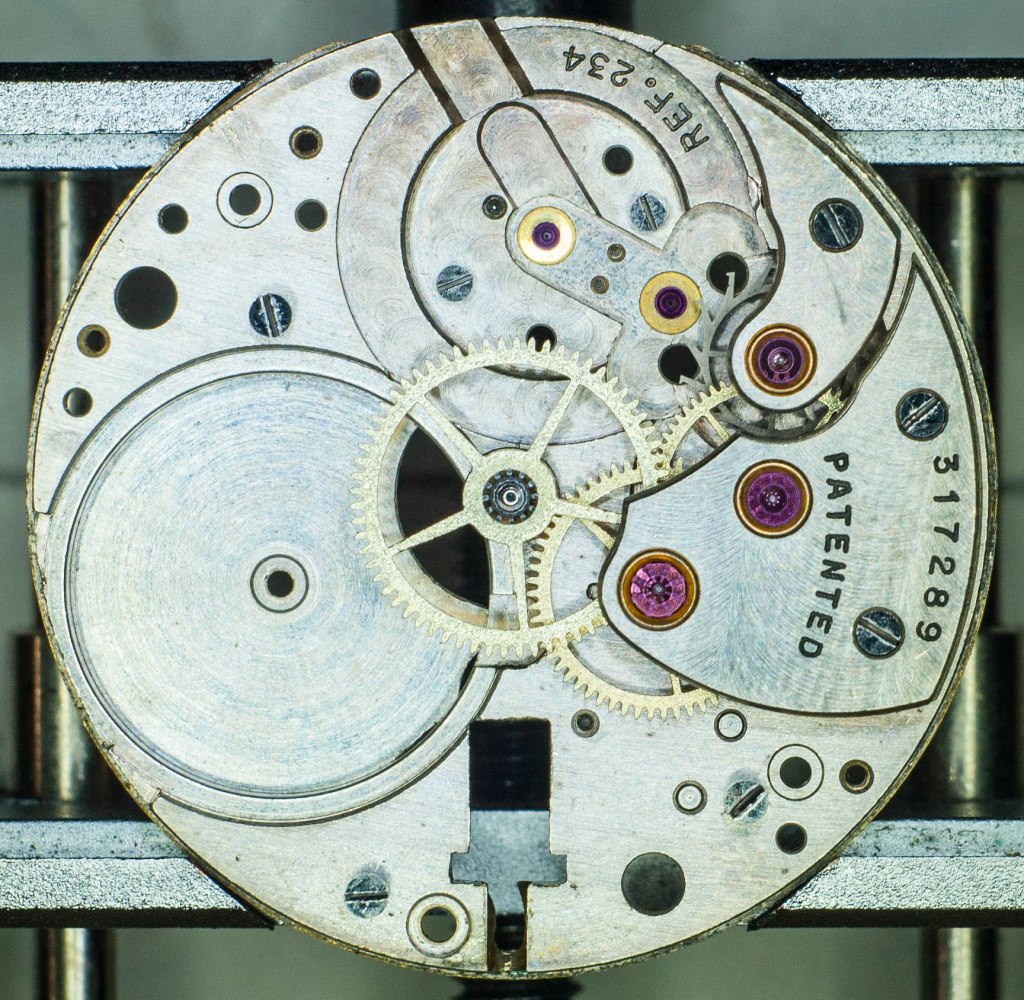
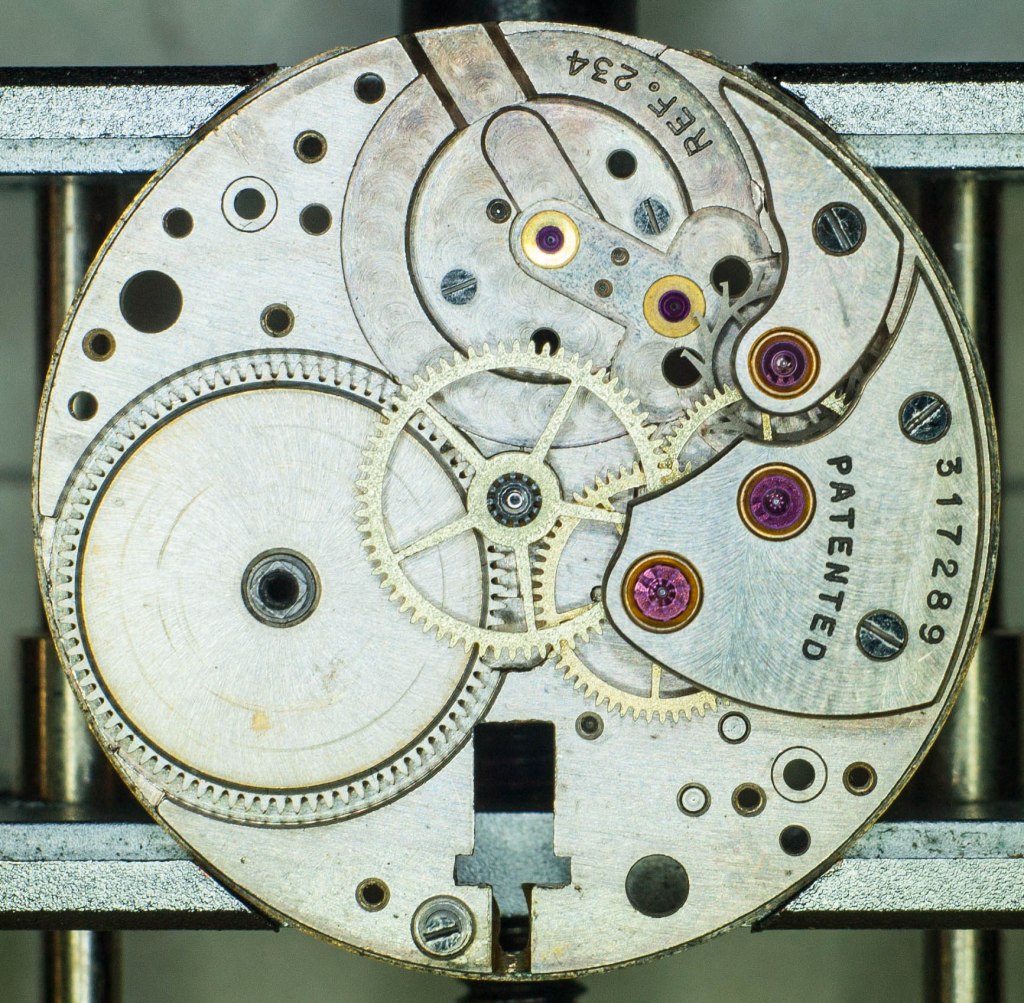
With the movement flipped over and with a couple of puffs of air to remove the worst of the debris things start to look a little more promising. Apart from the floppy balance wheel things don’t look too out of order. The hair spring looks to be in good shape and the screw heads don’t appear to be too mangled. Promising signs, but the first thing to investigate is the state of the balance staff.
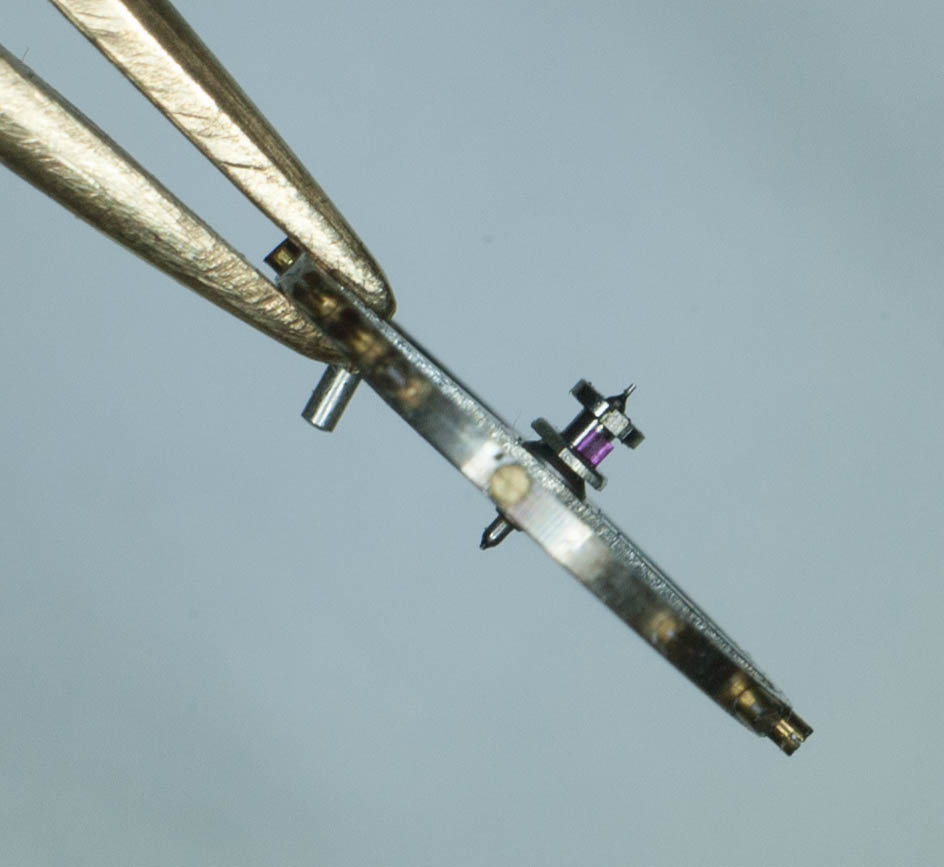
And here it is, the upper staff pivot sheared clean off. This isn’t any great surprise as this movement has no shock protection on the balance, and these pivots are are just about the most vulnerable part of the whole watch. I would wager that at one time replacing balance staffs would have been the most common repair to land on the jobbing watchmaker’s bench.
The hair spring stud is also canted in towards the staff rather than parallel to it so there is some adjustment required there too. However, the first order of business is to remove the old staff so that a new one can be installed.
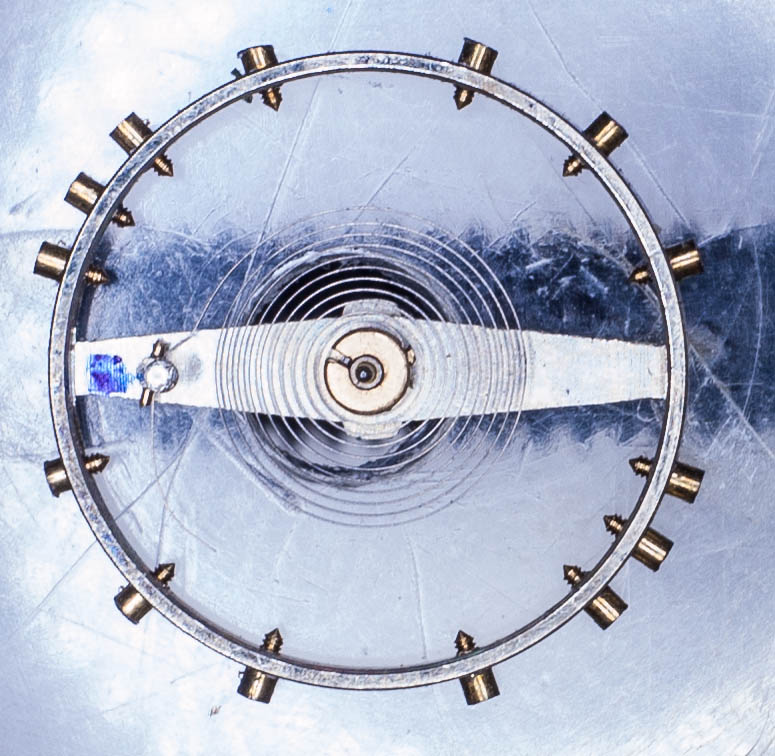
As an aide to reassembly I start by placing a mark on the balance wheel to show where the stud is resting. This may not end up being the right place but it gives me a starting point when put things back together. I can then remove the hair spring to a place of safety.
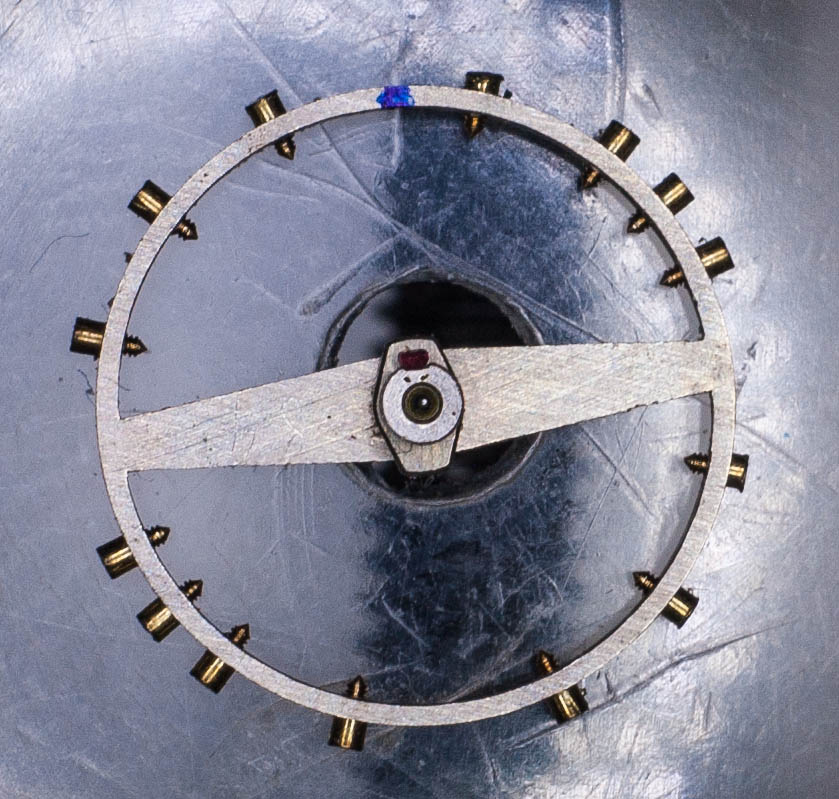
Then with the balance wheel flipped over I also mark the orientation of the impulse jewel.

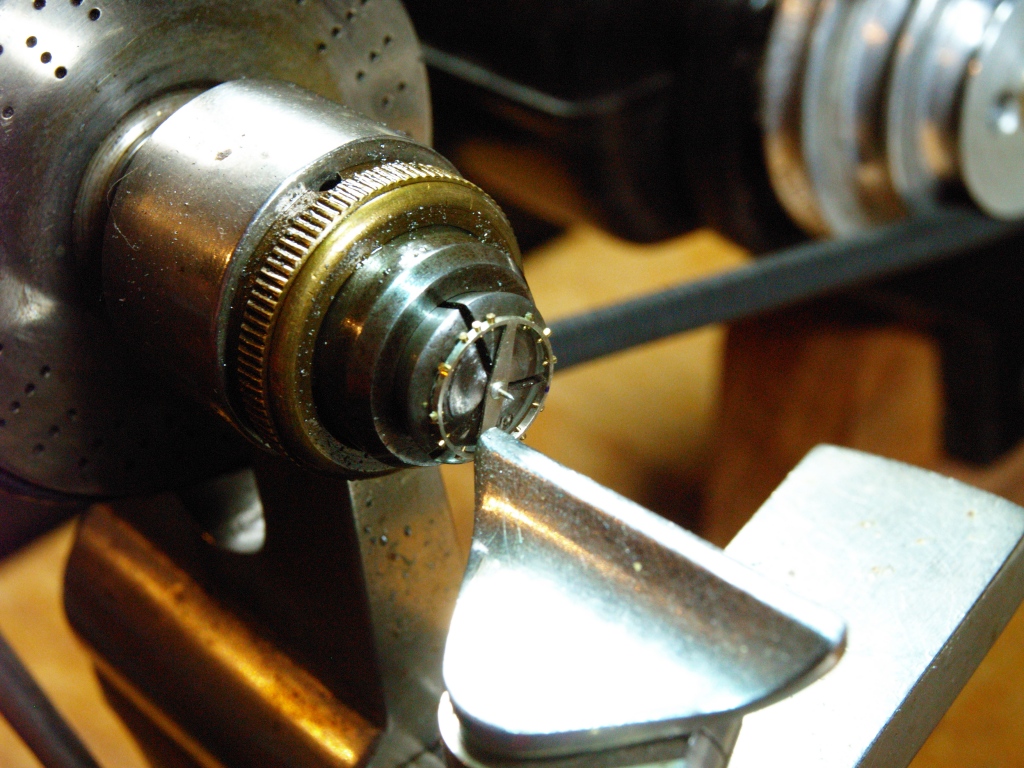
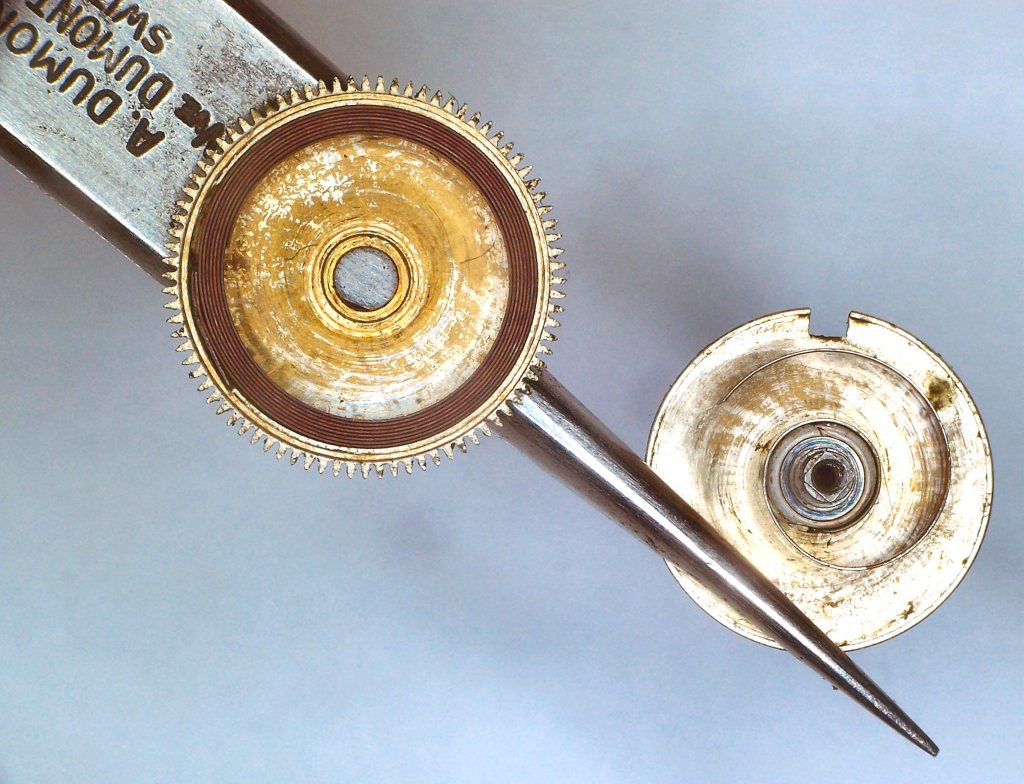
Then we go to the staking set to remove the roller table. The jaws of the roller removing stump (the bit below the balance wheel) clamp in between the balance wheel arms and the roller table, supporting the table. Then the stake comes down and pushes on the shoulders of the staff to push it out through the wheel.
A light tap is all that is needed and the wheel drops away from the roller table.
Then the old staff has to be removed without damaging the wheel. This is done by mounting the balance into the lathe and carefully machining away the hub or the rivet (I prefer to cut away the hub) so that the staff can be withdrawn from the wheel.
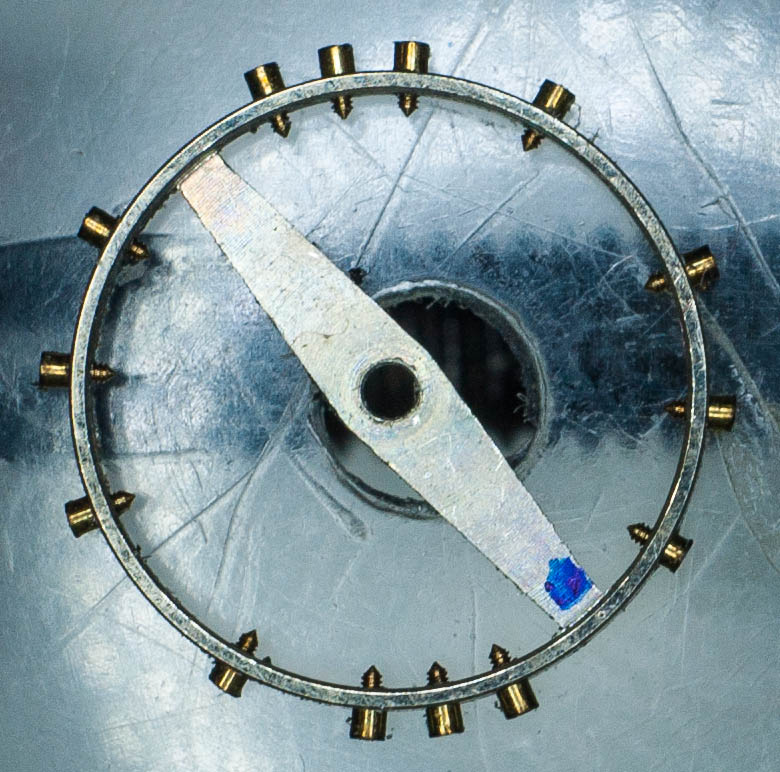
And here we have the balance wheel ready to to be fitted with a new staff, one of which I just happen to have in stock.
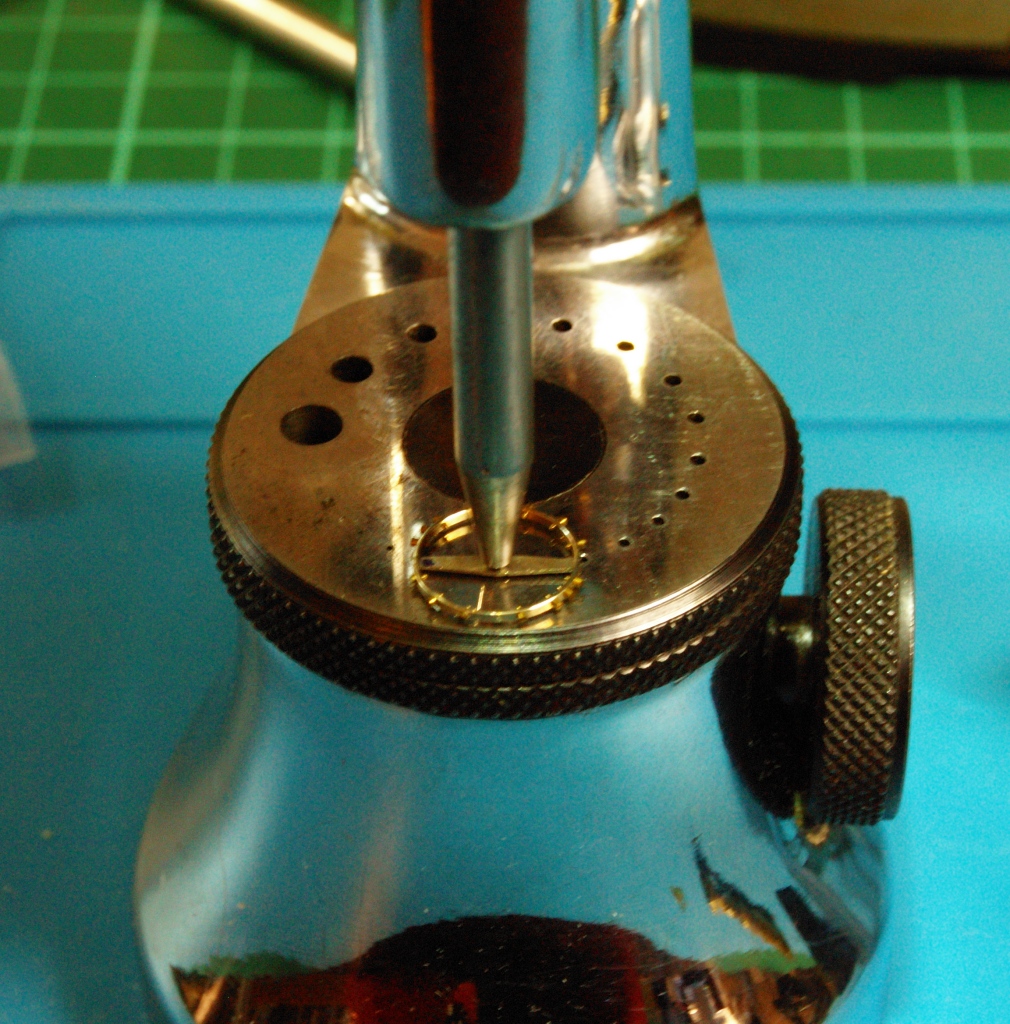
For this we have to go back to the staking set. The new staff is installed into the smallest hole in the table that it will fit into without binding, and then the balance wheel is fitted onto it, over the rivet and flat onto the hub. A hollow convex faced stake is then selected to fit over the staff and down onto the rivet. A few taps with a brass hammer then spreads the rivet and locks the wheel to the staff. The convex faced stake is then replaced with a hollow flat faced stake, and a few more taps sets the rivet firm.
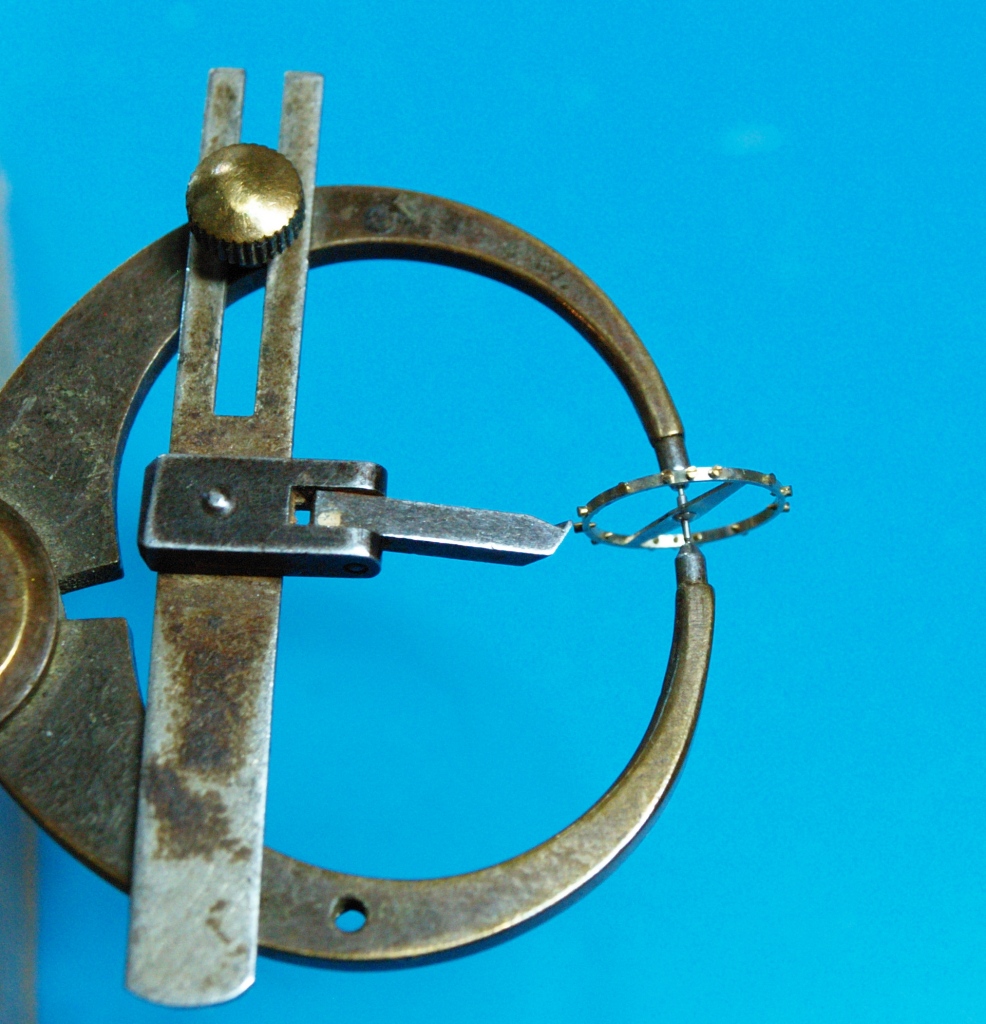
Next the balance assembly is placed into a pair of truing calipers to check that the wheel is true and flat, and that the staff is perpendicular to the plane of the wheel. If it isn’t then this is the time to make any corrections, thankfully none were needed this time.

Then the next thing that I like to do is to reinstall the balance into the movement, without the roller table or hair spring, so that I can check that it spins freely without any wobbles or binding. A new balance staff isn’t always a perfect fit and may need adjusting before it is right. Once again this was mercifully unnecessary on this occasion.
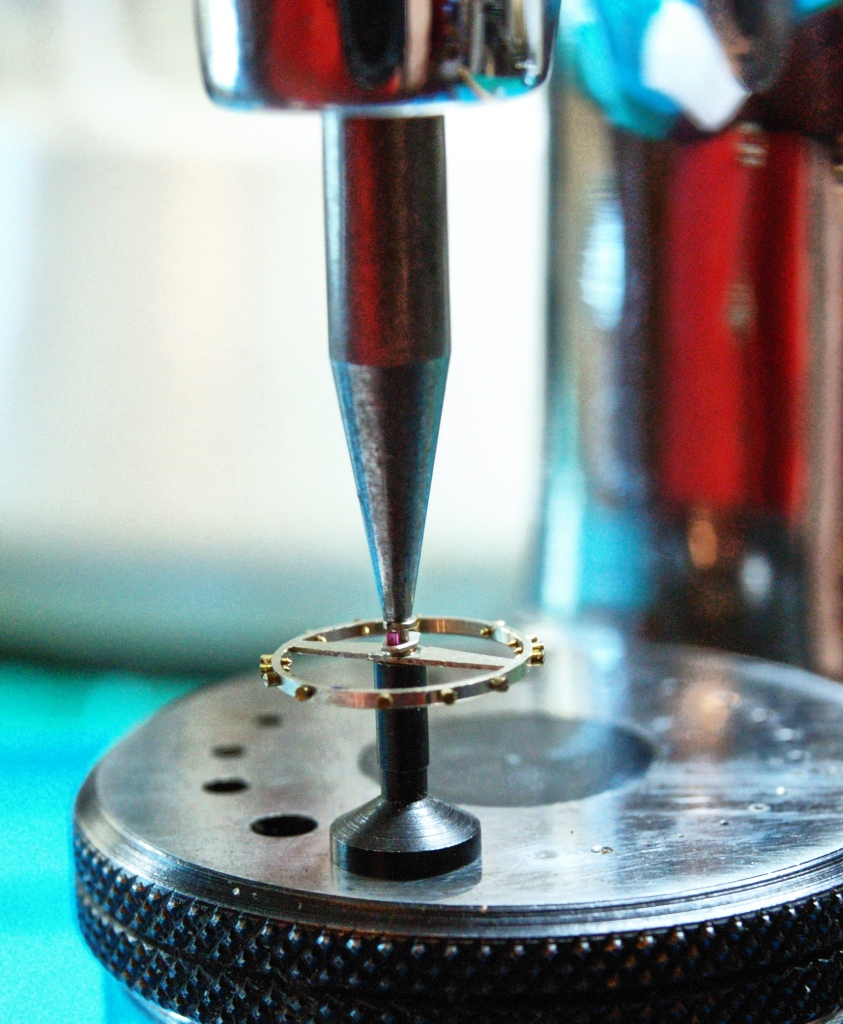
Then it’s back once again to the staking set to reinstall the roller table which is simply pushed down on the staff for a friction fit. The mark that I placed on the balance wheel rim earlier to show where the impulse pin should be means that I can reassemble the balance as it was. This is important because the balance wheel is balanced, or “poised” to make sure that there are no heavy spots around the rim when it is first manufactured. This is done with the roller table in place, so in order to (hopefully) return to the original factory poise, the roller table has to go back on the same way as it was to start with. I say hopefully because there is no knowing the watches service history, and it is entirely possible that a previous balance staff replacement wasn’t so conscientious and the roller table went back on the wrong way…..

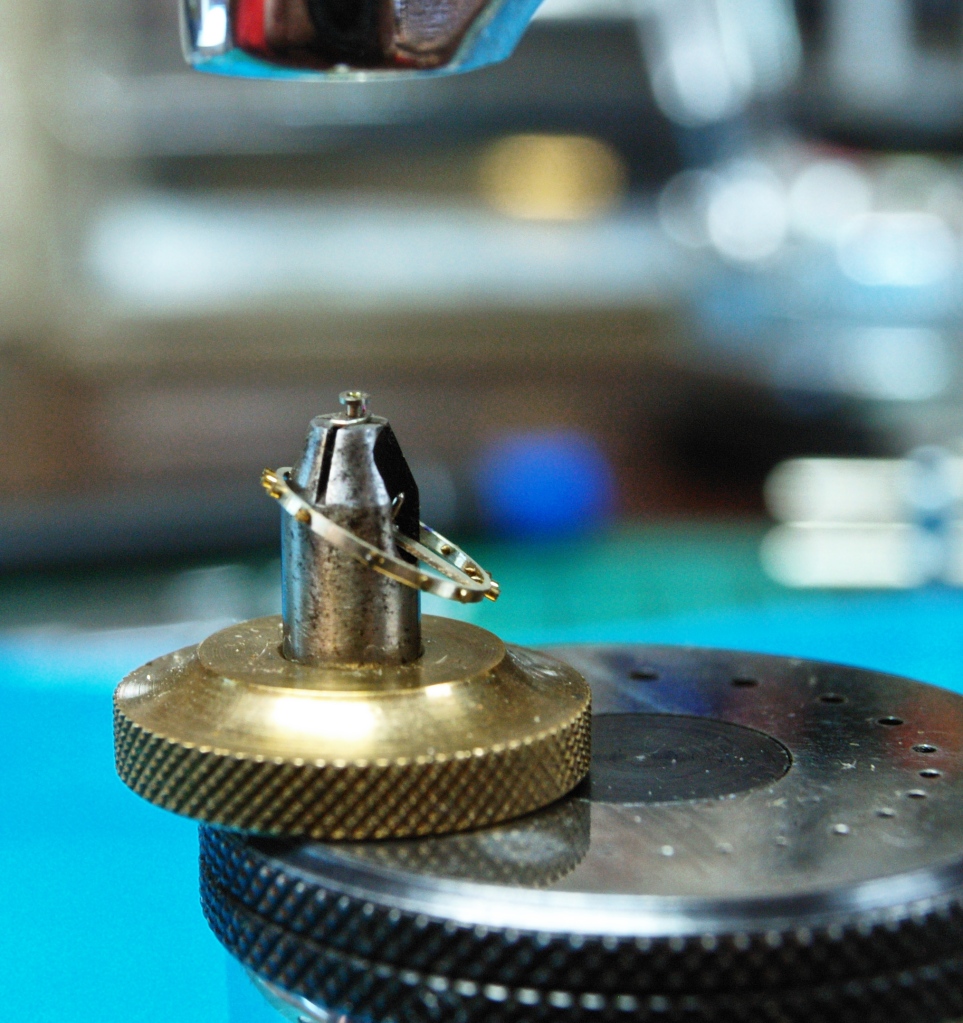
So to check that the poise isn’t hopelessly out the balance wheel/roller assembly goes on to the poising table. The jaws of the table are perfectly smooth and parallel to each other. The table is adjusted to be perfectly level, and the jaws adjusted so that only the pivots of the balance staff are resting on them. Then the balance wheel is gently rolled along the jaws using something like a fine paint brush (I actually use a cats whisker, dropped by one of my moggies) and allowed to come to rest. If the wheel has a heavy spot then it will always come to rest in one particular position, with the heavy spot at the bottom. You can then add weight opposite the heavy spot by placing timing washers under the screws in the balance rim, or remove weight from the heavy spot if there are already washers at the heavy location. You can also remove material from the actual screws if need be.
This one just required moving a couple of existing timing washers to get things nicely poised. The hair spring was then reinstated and the overhaul of the watch could progress with a full strip down….
Which brought to light another problem; the main spring was broken!!!! This poor little fella must have had a really tough time.

So whilst awaiting the arrival of the new mainspring everything else went through the cleaning machine and I made a few tweaks to the hair spring to bring it back to good order.
And the rebuild can begin…
I start with the escape wheel which has its own cock.
Then the train wheels….
And the train wheel bridge.
Then the main spring barrel complete with new main spring installed. Note that I have also installed the set lever screw. This has to go under the barrel bridge but it’s easily forgotten, and then you have to back track, which is annoying.

The barrel bridge, crown wheel, ratchet wheel, and click all in place. Before installing the components on the top of the barrel bridge I tested the whole train from the barrel through to the escape wheel to ensure that it ran freely. I also oiled the barrel arbor pivots since the top one isn’t accessible once the ratchet wheel is installed. At this point I also like to oil all of the train wheel pivots.
Next I install the pallet fork and check the operation of the escapement, oiling the pallets as I do, before installing the balance and balance cock. For some reason I don’t seem to have any photographs of these steps, but suffice it to say that all went well and the watch started ticking with just a half turn or so on the main spring.
So next the movement is flipped over and the key-less works go in. This is the point where you discover that you forgot to install the set lever screw before you put the barrel bridge back, and end up having to retrace your steps, unless of course you didn’t forget 🙂
The assembled key-less works.
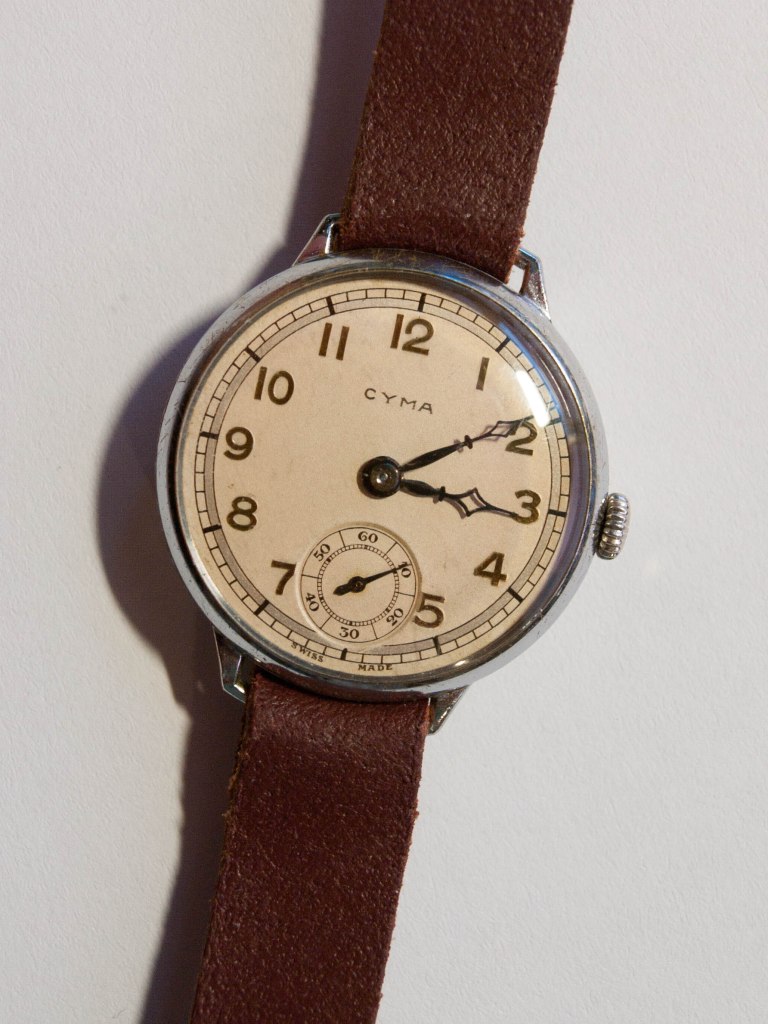
From here the cleaned up dial and hands went back on and the movement returned to its cleaned up case. The case went through my ultrasonic tank with just some dish soap, and then a light polish before I straightened out the lugs. A new stem was sourced and fitted along with a period appropriate vintage crown from my own stock. A new low profile crystal was installed which I think gives this watch a very classy look.
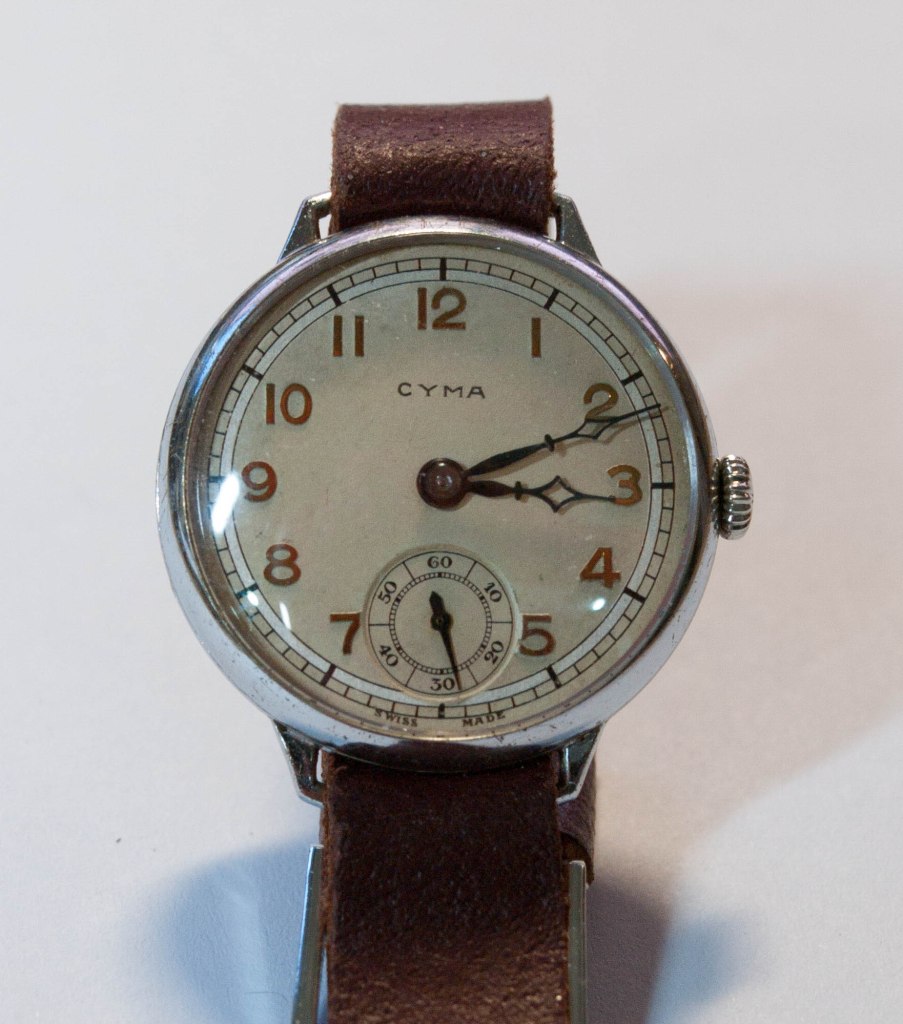
With a strap lug width of just 13mm finding a strap for this watch was always going to be a challenge so I decided to make a “service” strap as a temporary solution. I shall probably end up making a proper strap for it too as there seems to be little to be had that is suitable. It will probably be a Bund style strap so that there is a barrier between the wearers skin and the exposed nickel on the case back.
When I started out on this project it was with the intention of moving the end result on, I didn’t see it as being something that I would wear, not at just 30mm across. However, I have come to really like it, it’s a classy little watch and it keeps incredibly good time. It’s very comfortable on the wrist, and it wears bigger than its diameter would suggest.
A challenging but delightful little watch to rescue, but all in all, very well worth the effort.

Nice to see another post , I was wondering where they`d got to : ) . I really enjoy these very detailed excursions , it`s very interesting to see the intricacies of watchmaking and the tools and equipment involved in the adjustment , examination and assembly of the various parts , so many dedicated tools for each procedure , fascinating . A lovely end result on this battered watch too , it looks really nice . The Dirty Dozen WWW`s are a very interesting piece of recent history too , I would have erroneously assumed that British Military watches would be Smiths . The quantity and speed of production seems to have favoured the many Swiss producers . Great post very well written and explained for the layman like me , much appreciated . I look forward to the next one , Best Wishes , Huw .
LikeLike
Hi Huw, thanks as always for your kind comments.
In spite of all my good intentions to post more articles this year I have struggled to find the time, partly as a result of “Grand Dad Duties”!!! and partly because I rekindled an old passion earlier this year and bought a motor bike. Great fun to be back on two wheels after a 25 year break 🙂
I don’t think that Smiths had any wrist watches to offer during the war, I seem to remember that they started in production around 1947. They did subsequently supply watches to the MOD but not until after the war.
I hope that I’ll be able to get another post out soonish 🙂 All the best. M.
LikeLike
Haha , I showed my ignorance there with Smiths watches , they were as you said produced from 1947 and supplied the W10 to the military , it looks as though there were no British watch manufacturers in the early C20 at a glance , seems the Swiss had a monopoly .
LikeLike